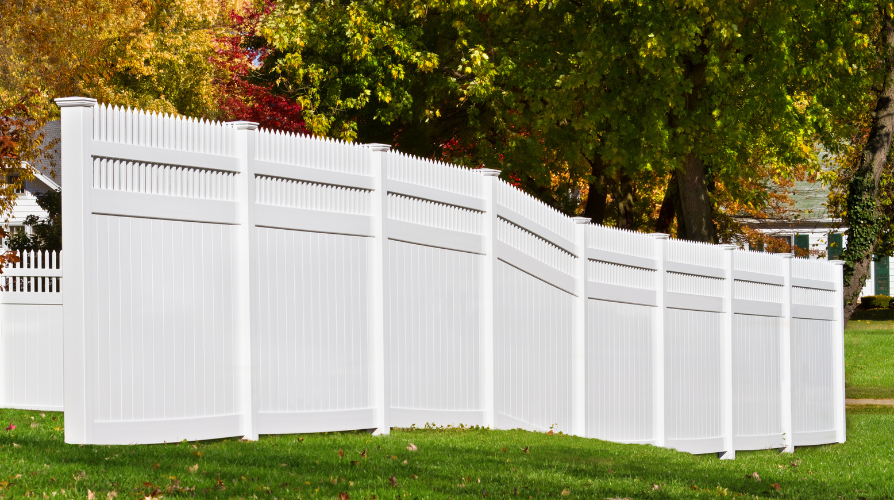
Installing vinyl fencing on uneven terrain might seem tricky, but it's definitely doable with the right approach. Whether your yard has gentle slopes or more dramatic changes in elevation, vinyl fencing can be customized to fit. Let's break down how you can tackle this project with ease.
1. Assess the Terrain
The first step is to assess how uneven the ground is. Walk along the path where you plan to install the fence and note the areas that rise or dip. This will help you determine the best approach for installation.
There are two main methods for dealing with uneven ground: stepped installation and racked installation.
2. Stepped Installation
The stepped installation method is ideal for more severe slopes or if you want a clean, uniform look. This method involves installing each panel at a different height, creating a "stair-step" effect. Here’s how it works:
- Straight Posts: The posts are installed straight and level, but the panels are attached in increments that match the slope.
- Panels Adjust to Terrain: The panels between the posts will not follow the slope, but instead, they’ll create a step-like appearance.
This method works well when you’re dealing with a steep incline, but the end result may show gaps at the bottom of the fence in certain areas.
3. Racked Installation
For more gradual slopes, the racked installation method is a better choice. Racking allows the fence panels to follow the natural slope of the ground. Instead of stepping, the panels angle slightly to match the terrain. Here’s how:
- Angled Panels: The fence panels are flexible enough to angle slightly up or down as they are installed along the slope.
- Even Appearance: With this method, the fence flows smoothly with the terrain, reducing gaps at the bottom.
Racking creates a more natural, continuous look without sharp steps or breaks.
4. Customizing Panels for Uneven Ground
Sometimes, the standard vinyl fence panels might not fit perfectly due to the uneven ground. If that's the case, you can trim the panels to ensure a better fit. Make sure to use proper tools to avoid damaging the vinyl material. Always double-check measurements before cutting, so you get a precise fit.
5. Secure and Stabilize Posts
Regardless of the method you choose, it's important to ensure that the fence posts are securely anchored. Uneven terrain might create weak spots if the posts aren't installed correctly. Here's what to do:
- Dig Deep: For stability, dig deeper post holes in areas where the ground dips or rises significantly.
- Use Gravel or Concrete: Fill the holes with gravel or concrete to anchor the posts firmly, ensuring they stay upright over time.
6. Plan for Drainage
When installing vinyl fencing on uneven terrain, be mindful of water drainage. If water pools around your fence posts, it can lead to instability over time. You can grade the soil or create small drainage channels to direct water away from the fence.
7. Check Local Regulations
Always check local building codes before installing a fence, especially on uneven terrain. Some areas have regulations regarding fence height and placement, and you may need a permit.
Installing vinyl fencing on uneven terrain requires a bit more planning and customization, but the results can be beautiful and durable. Whether you choose stepped or racked installation, the key is to adapt the fence to your landscape while keeping everything secure.
Weigh the pros and cons, assess your skills and resources, and make the choice that’s best for you.
Work with a professional installer who uses products from Modern Fence Technologies. Or, if this is a do-it-yourself type of project, ask your retailer for our products.
For more inspiration and high-quality fencing options, check out our wide range of products and take your fencing project to the next level.
With a little patience and attention to detail, you’ll have a sturdy fence that enhances your outdoor space!

