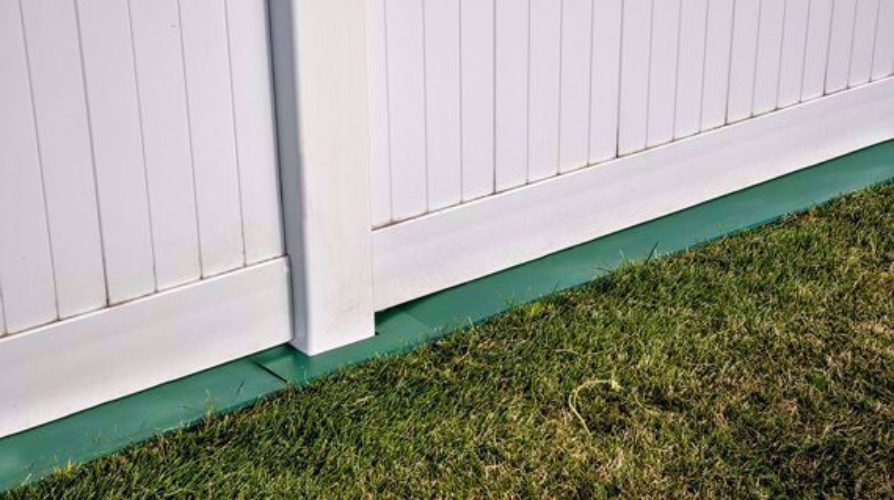
If you’ve been battling pesky weeds creeping onto your property, installing a weed barrier fence might be the perfect solution. These fences can keep unwanted growth at bay and make lawn maintenance a breeze. Here are ways to install a weed barrier fence, with tips on getting the job done right.
What You’ll Need
Here’s a quick list of essentials for this project:
- Weed barrier fabric or heavy-duty landscaping fabric
- Fence posts
- Weed barrier stakes or garden staples
- Hammer or mallet
- Shovel or post hole digger
- Measuring tape
- Utility knife or scissors
Step-by-Step Installation
1. Plan Your Fence Line
Start by mapping out the area where you want to install the weed barrier fence. Mark the corners and use a measuring tape to figure out the fence length, then mark where each post should go (usually every 6-8 feet).
2. Dig Holes for the Fence Posts
Using a shovel or post hole digger, dig holes where you marked for the posts. The holes should be deep enough to securely hold each post, usually about a third of the post’s height.
Tip: For rocky or uneven ground, Modern Fence Technologies offers sturdy post anchors that can keep your fence in place, even on challenging terrain.
3. Install the Fence Posts
Place each post into its hole, making sure they are level. Fill the hole around each post with soil, pressing it down firmly to stabilize the posts. For a more secure hold, you might want to use gravel or concrete around the base.
4. Lay Down the Weed Barrier Fabric
Once your posts are in place, it’s time to lay down the weed barrier fabric along the fence line. Roll it out, ensuring that it overlaps with the base of your fence posts.
Pro Tip: Overlap each section of fabric by about 4-6 inches to make sure weeds won’t sneak through any gaps. Modern Fence Technologies offers heavy-duty Weed Barrier Fence and Post Saver. It is made up of a high-quality, flexible molded plastic with a UV-block, so it will not rot, rust, or lose its shape.
5. Secure the Fabric with Stakes or Staples
To keep the fabric in place, use weed barrier stakes or garden staples. Place them along the edges of the fabric every 2-3 feet. This keeps the fabric taut and prevents it from shifting over time.
6. Attach the Fence Material
Now, attach your chosen fence material to the posts. The fence can be wire, mesh, or even a simple wooden design, depending on your aesthetic preference and level of protection needed. Attach it securely with clips, screws, or ties.
7. Trim Excess Fabric
After the fence is up, use a utility knife or scissors to carefully trim away any excess fabric along the fence line. Be sure not to cut too close to the staples, as this could cause the fabric to come loose.
Installing a weed barrier fence may take a bit of effort, but it’s an effective way to keep weeds out and protect your landscaping. By following these steps, you can enjoy a low-maintenance, weed-free area that looks clean and tidy.
And remember, using high-quality materials will make a world of difference in how long your weed barrier fence lasts. Work with a professional installer who uses products from Modern Fence Technologies. Or, if this is a do-it-yourself type of project, ask your retailer for our products.
For more inspiration and high-quality fencing options, check out our wide range of products and take your fencing project to the next level.
Happy fencing, and enjoy your weed-free space!

